Learn how to add a virtual machine to your Windows 10 startup, which is useful for starting your critical services and applications hosted in VMWare Workstation platform.
Shell:Startup method
This method starts VMs AFTER you login to Windows
- Add the following code to a new bat file
auto-start-vm.bat, and replace VMX file path with the one from the desired VM:
| |
For VMs that don’t need to appear on the screen (Run in the background), just add nogui as follows:
| |
- Press Windows Key + R to open a location, and enter
shell:startup. - Copy
auto-start-vm.battoshell:startup.
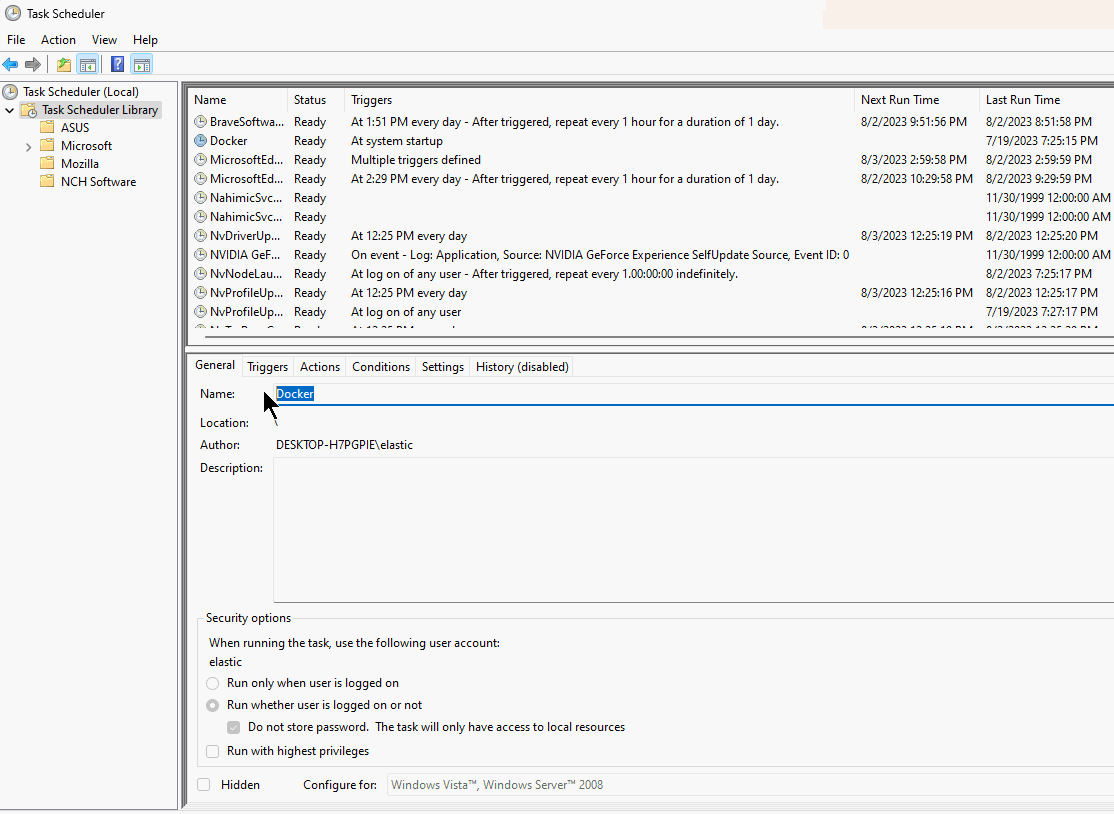
Task Scheduler Method
With this method you can start VMs before you login to Windows. This is a popular option for DNS & Active Directory servers to work immediately on computer startup.
- Create the bat file as described above.
- Search Windows for
Task Scheduler. - In
Task SchedulerclickCreate Task. - Choose a name for the task.
- Choose
Run whether user is logged on or not. - Under
Triggerstab > add a new trigger >At startup. - Under
Actiontab > Start a program > browse to yourauto-start-vm.bat. - Save task.
- The task will now run every time you restart your computer and before any user logs in.
Window update may break the task during major updates. When this happen you may open
Task Schedulerto trigger your task manually, or restart your computer again after completing any Windows update dialogues.